It’s pretty easy, and you can do it from a computer or a mobile device! Pick a photo book or an album and its desired attributes. Upload your pictures to our free online image editing tool and start scrapbooking. You will have two options: adding your photos one by one, or having your book auto-filled with a selection of your pictures. Then, unleash your creativity by reorganizing virtually anything in the layout -- add ClipArt images, captions, frames, and much more. Before ordering a printout, take advantage of our Preview mode to review your work. Collect your book in-store at your nearest Jean Coutu Pharmacy, or have it delivered by mail throughout Canada.
Step-by-step process
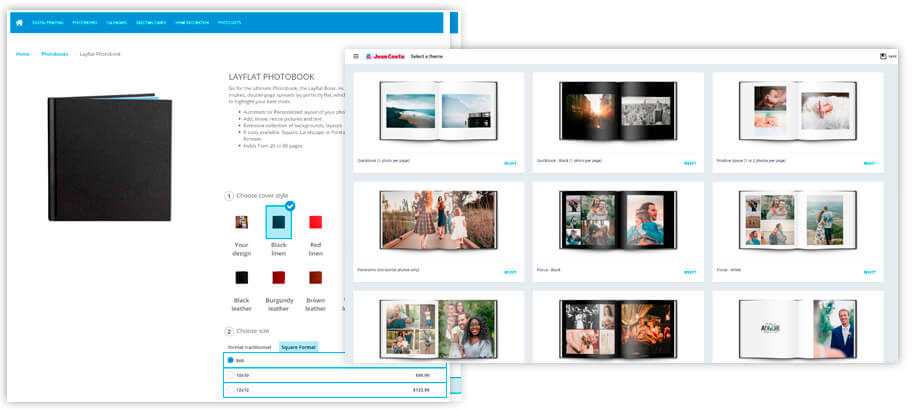
1. Pick photo book template
First, decide on a type of book: layflat, hardcover, softcover, etc. Choose the attributes if applicable (eg. the cover’s colour). Then, choose which layout is best according to the number of pictures it holds. We have indicated the minimum required for each book. To help you make a decision, browse through the pages of the different templates. When you’re set, click or press Select to begin customizing your article.
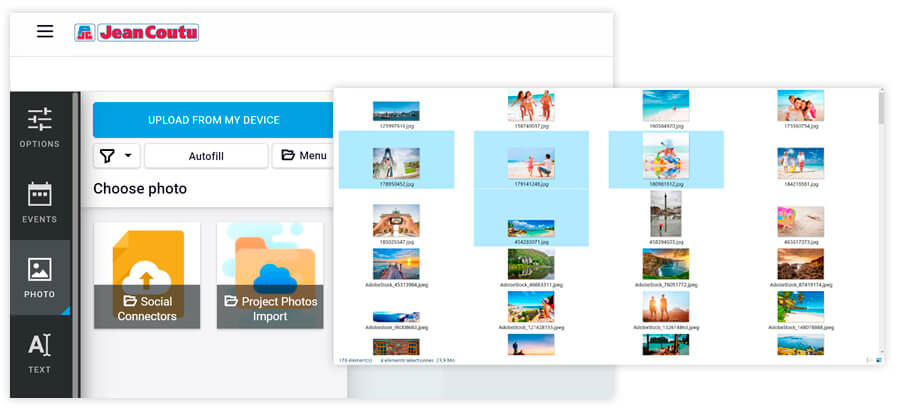
2. Upload your pictures online to our image editing tool before adding them to your photo book
Before you get started, here are a few tips.
- Group your pictures in a folder.
- To select several pictures at a time, hold the CTRL (PC) / CMD (Mac) key.
- To select all the pictures in a folder, hold CTRL+A (PC) / CMD+A (Mac).
Then, import your image files into our server, in our online editing tool. Files can come from a computer or mobile device, a social media account, or an old project stored on our servers. This digital studio experience is free, and available online, on a computer or mobile device – at your convenience.
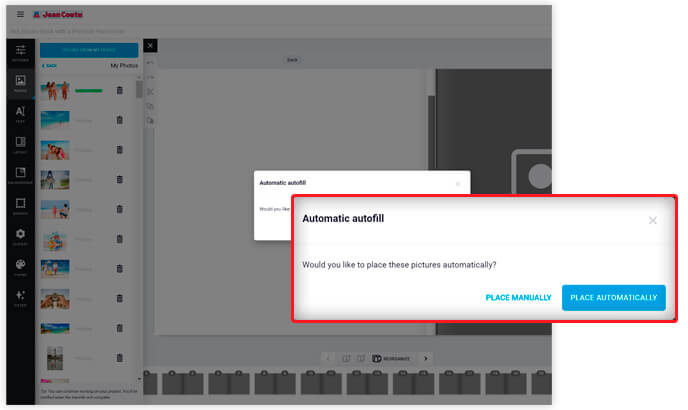
3. Customize your photo book by adding your pictures
After having uploaded your pictures to our server, a pop-up will appear. You can have your book auto-filled with your images selection. Click or press Place automatically.
Don’t worry, you will also be able to move, delete, replace, switch, and import new photos while customizing your book. You will even be able to Change product (pick another template).
Book filling options
Fill in the pages of your book manually by adding your pictures one by one. Choose the blank book template. Do not select any pictures. Select Customize my book in the top right corner of your window. Click or press Continue when notified that the pages of your album will not be filled automatically.
Have the pages of your book filled in automatically with your pictures, and then edit the layout. Choose the auto-filled book template. Put your photos in the order that you wish them to appear; the first one will be displayed on your album’s cover. You can pick your images one by one or Select all of them. Then, click of press Customize my book.
What’s the exclamation mark pop-up for?
The "!" means that the image resolution is not sufficient, and the picture might be blurred when printed out. We recommend choosing another image.
Image options – How to add and edit pictures
To add a photo to your book, select the Image zone (a grey area in the layout). Then, select the Photo button in the toolbar on the left side of your window. Select a picture, and click/press on it to display the editing options
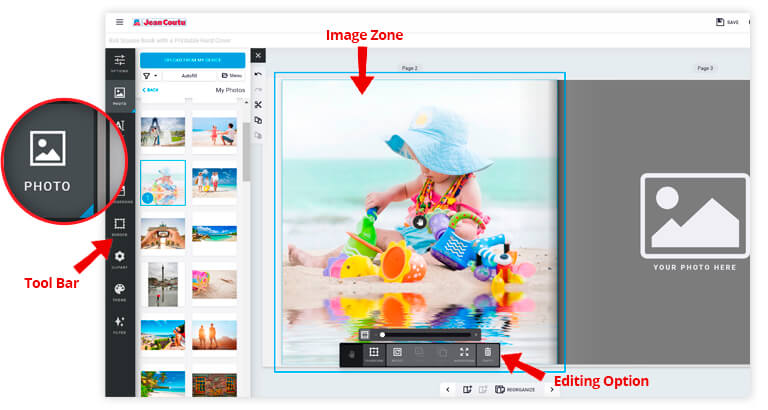
 The Pan/Zoom button selects, moves and resizes a picture.
![]() The Transform button selects, moves, turns and crops a picture.
The Transform button selects, moves, turns and crops a picture.
 The Rotate button turns a picture on itself.

 The Front/Back buttons bring a picture forward, to the front, push it backwards, or to the back.
 The Empty button allows you to delete a selected picture.
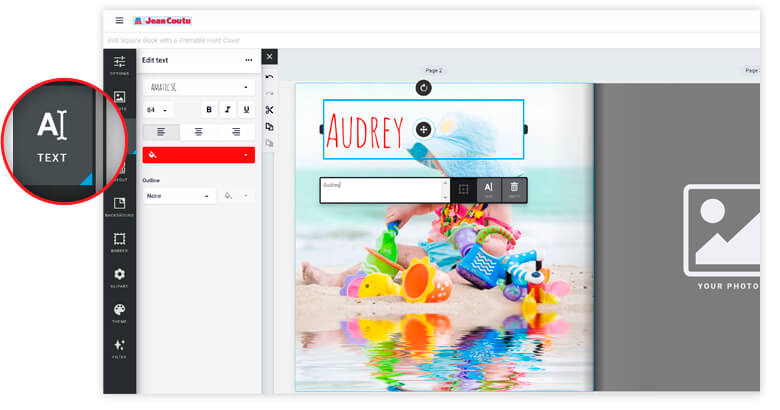
Text options -- How to add captions to your photo book
Select the Text button on the left side of your window to write a caption. Choose from a vast array of fonts, colours, and sizes.
More options -- Customize the layout of your book
You can tweak the presentation of your book. Insert ClipArts, modify the background, and/or replace visual components including pictures. You can even add pages! To switch book format, select Change product in the top right corner of your window.
 The Filter button adds a black, white or sepia filter to a picture.
 The Border button frames a picture.
 The Layout button edits the presentation.
 The Theme button switches layouts.
 The ClipArt button inserts a ClipArt file.
 The Background button modifies the back of the presentation (ex. colour, image).
![]() The Undo button goes back in time by cancelling the last action.
The Undo button goes back in time by cancelling the last action.
 The Redo button enables reinstates the last cancelled action.
 The Cut button deletes a selected element.
 The Copy button makes a copy of a selected element.
 The Paste button pastes a selected element that you have copied and/or cut out.
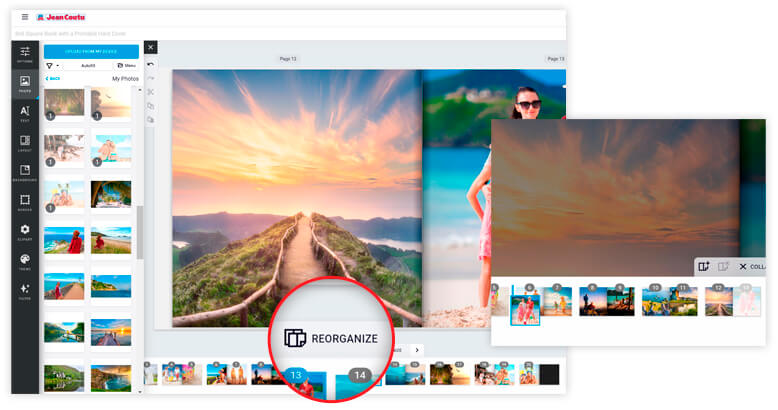
Good to know
When creating a photo book or album, you can re-arrange the order of your pages. You can add and/or delete pages as well as change the order in which they appear. To do so, select Reorganize at the bottom right corner of your window.
To move a "pages view" in your book, select the two pages of the open book and drag them between two other double-sided pages.
 The Add button allows you to insert a double-sided page.
 The Delete button suppresses a double-sided page.
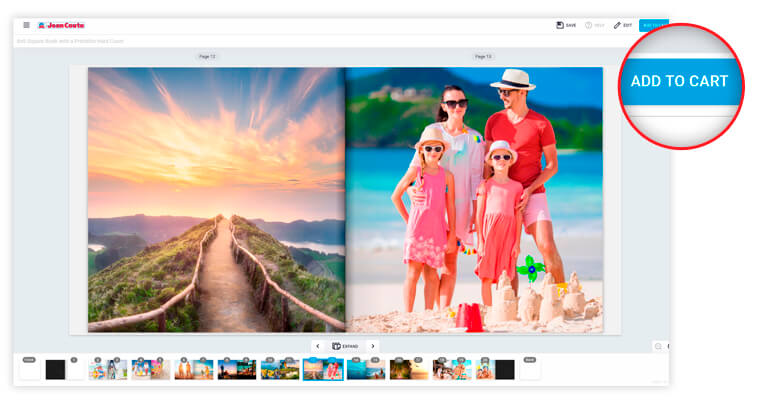
4. Order online a printout of your custom photo book
Did you revise your work? Select Preview in the top right corner of your window to have a group view of all your pages. Satisfied? Click or press Add to cart to place an online print order.
Frequently asked questions
Where can you print photo book or photo album near you?
Use our image editing tool to gather your best pictures in a book or an album. Sign in to your account, and follow this step-by-step process.
Do you need a digital photo camera in order to use our editing tool?
No. However, you must have access to your photo from a digital device. Scan them or ask a Jean Coutu Photo Centre clerk to transfer your pictures onto a CD-ROM (extra fees apply).
How long should it take before receiving your photo book?
The average delay is seven business days.
Which image formats are accepted?
We allow JPEGs, BMPs, PNGs, and TIFFs. For best results, we recommend using a JPEG format. We also recommend converting HEICs into JPEGs with the media converter iMyFone.
Will you be enjoying a high-quality print?
Absolutely! Even photographers have us print their portfolios.